
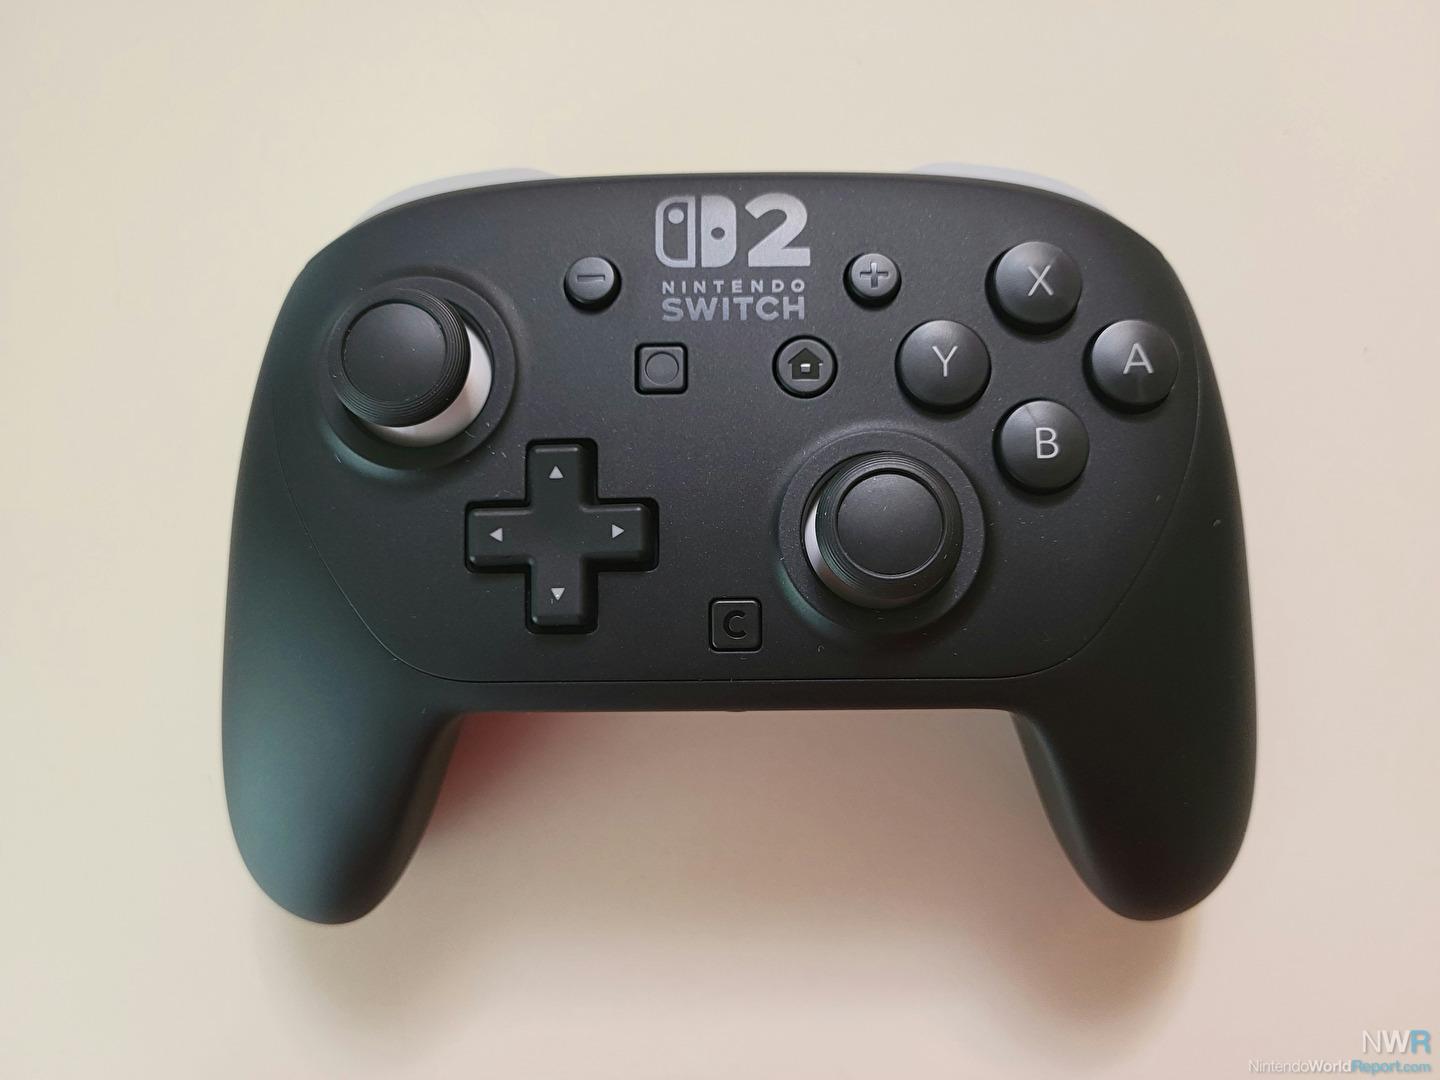
Justin rips open certainly one of Nintendo’s newest controllers to mend the D-Pad because the corporate that invented it forgot lead them to correctly.
Sure, I have defined it in my Transfer 2 Professional Controller first impressions, however the D-Pad on Nintendo’s newest professional gaming pad nonetheless sucks. The corporate that invented and perfected the instrument simply can not lead them to paintings correctly anymore. I must be truthful regardless that, as this is not only a Nintendo drawback at the moment as many 3rd birthday celebration D-Pads are simply as busted. I do not know why creating a purposeful D-Pad is this type of misplaced artwork as we will be able to return to the stack of NES controllers I personal and measure each size to make a running and easiest piece of kit.
For the ones of you that suppose the D-Pad is operating positive I problem you pass open the Transfer 2 Machine Settings, Controllers & Equipment, after which Check Enter Units. Cling one Course at the D-Pad and rock it round just a little. You can understand that inputs perpendicular to the button you pressed is being precipitated. Whilst this won’t topic in some D-Pad video games, it may be disastrous in others. Combating video games are a large one, or even doing a operating ducking soar within the unique Tremendous Mario Bros. is just about unimaginable.
Alternatively, there’s a option to a great deal beef up the Transfer 2 Professional Controller D-Pad. This resolution is just for the courageous regardless that because it calls for you to open that controller as much as preform what’s referred to as a Tape Repair. This repair has change into standard on trendy controllers as a result of D-Pads are so steadily made poorly at the moment. That mentioned, please evaluate a phrase of Caution under.
The Following is for Instructional Use Handiest
If You Try the Following You Do So At Your Personal Chance
If You Open Your Controller You Void Your Guaranty
If You Do Anything else Indexed On This Web page You Do So At Your Personal Chance
If You Do Anything else Indexed On This Web page Nintendo International Document Is Now not Accountable
If You Do Anything else Indexed On This Web page The Creator Is Now not Accountable
The Creator Is Now not An Professional on Electronics Restore
If you happen to do the Tape Repair for your controller the D-Pad will nonetheless no longer be easiest, however total will serve as a lot better than it does emblem new. I must additionally notice that you’ll have to press just a little tougher in each and every route to get an enter to serve as after that is entire.
Issues You Want:
Nintendo Transfer 2 Professional Controller
Small Screwdriver Package
Guitar Choices
Transparent Packing Tape
Sharp Razor Blade/Field Cutter
Tweezers
Excellent to Have Pieces:
Toothpicks
ACID FREE Silicone Glue
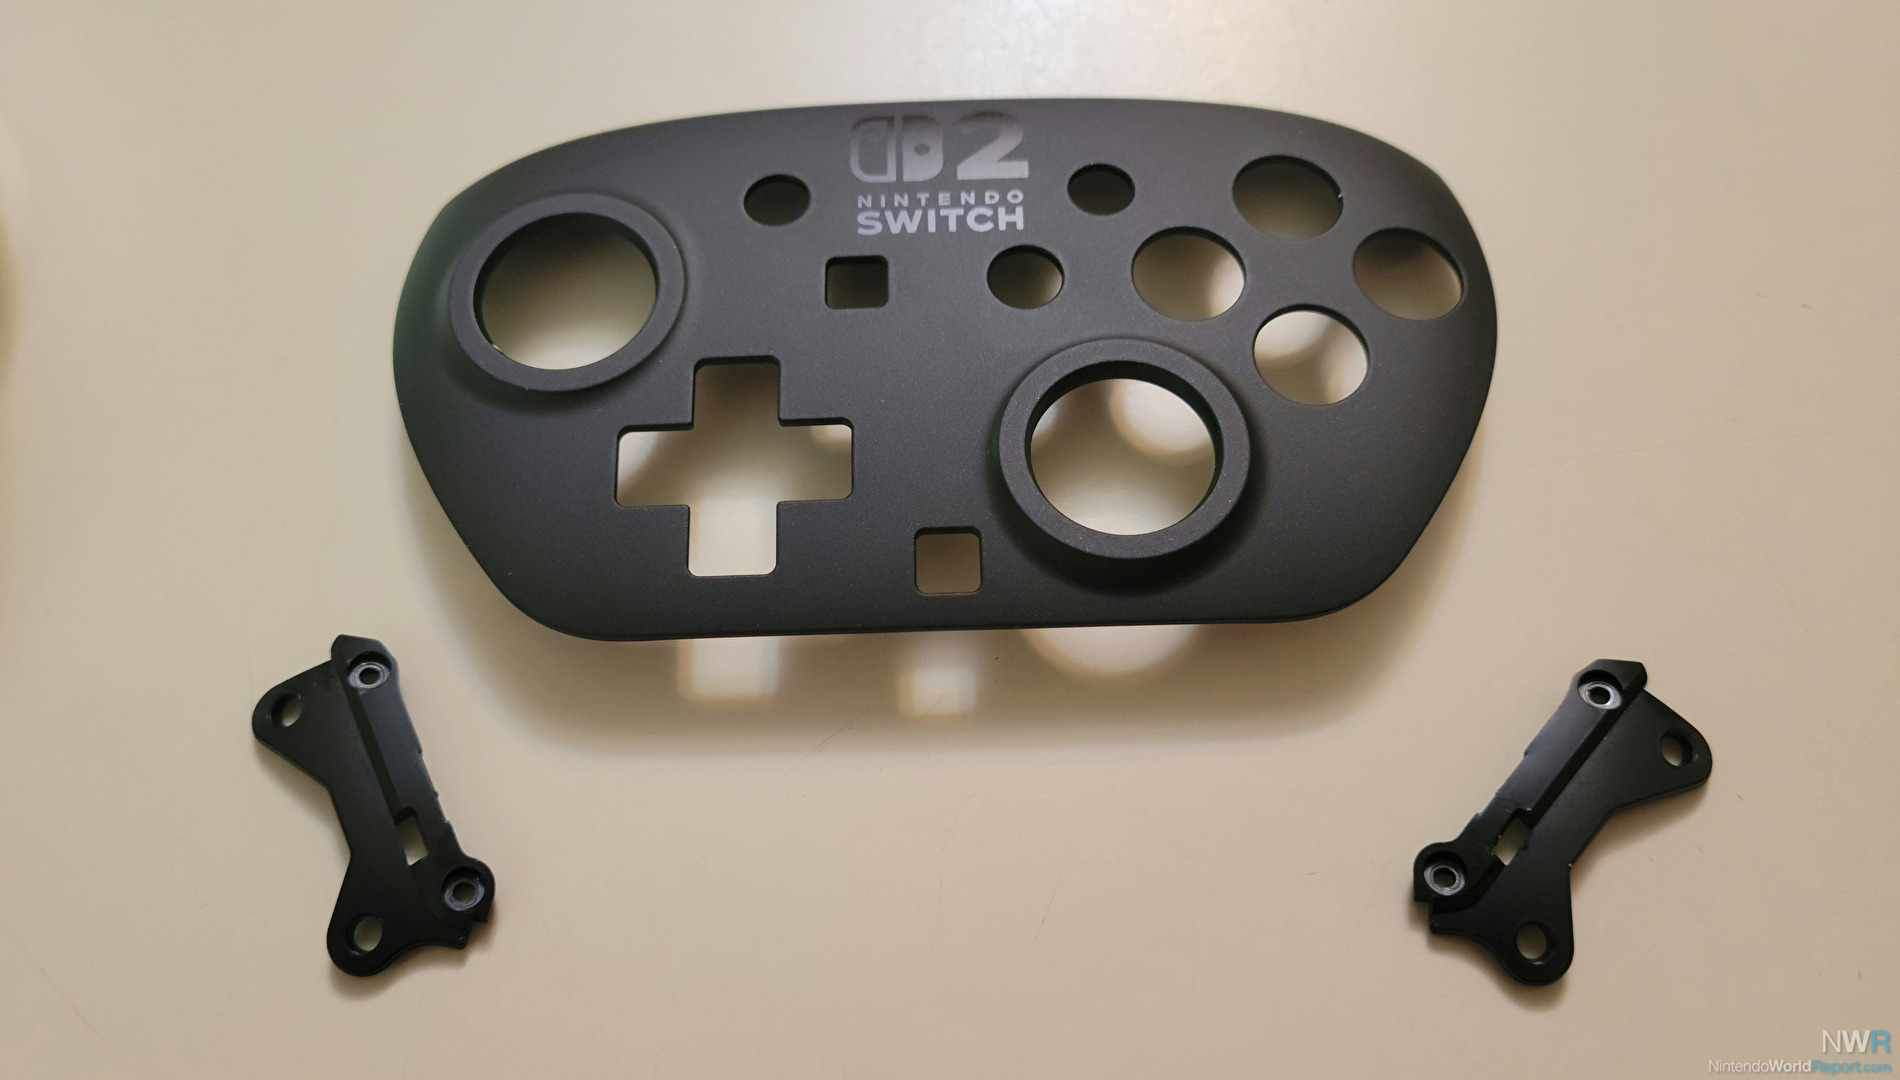
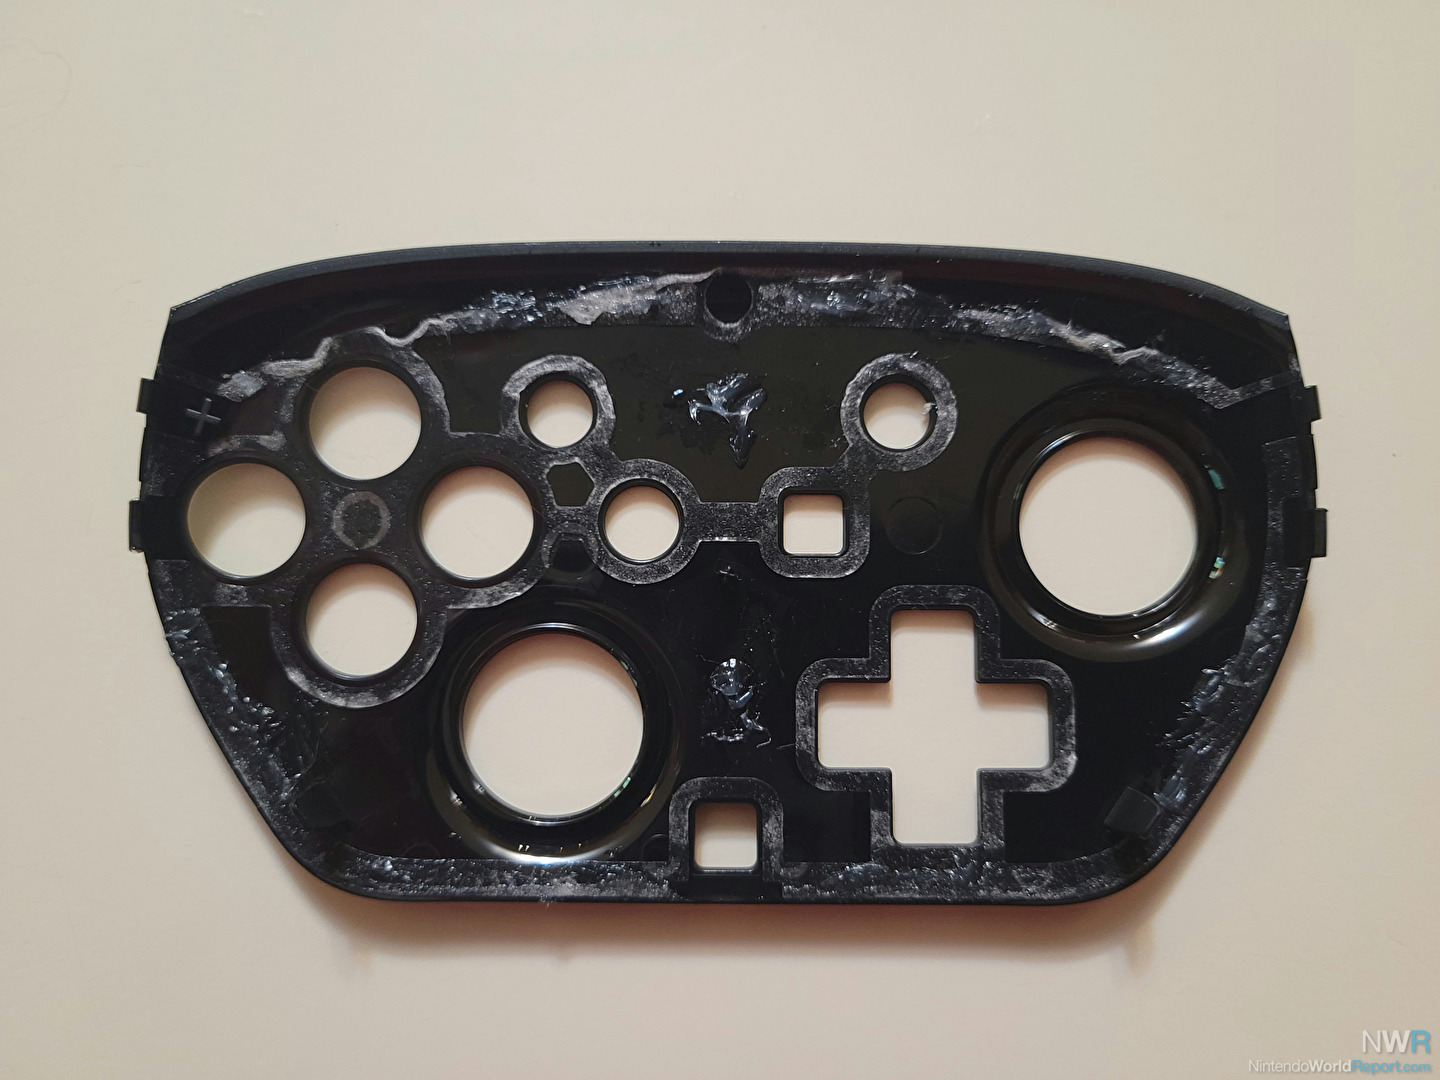
Very first thing you could understand is there are not any screws visual at the Nintendo Transfer 2 Professional Controller. It’s because the entrance plate is most commonly hung on through adhesive and a couple of clips. To me, that is crappy design and when placing it again in combination YOU MAY have to connect it again your self just a little however your mileage might range. (Extra at the conceivable glue later.)
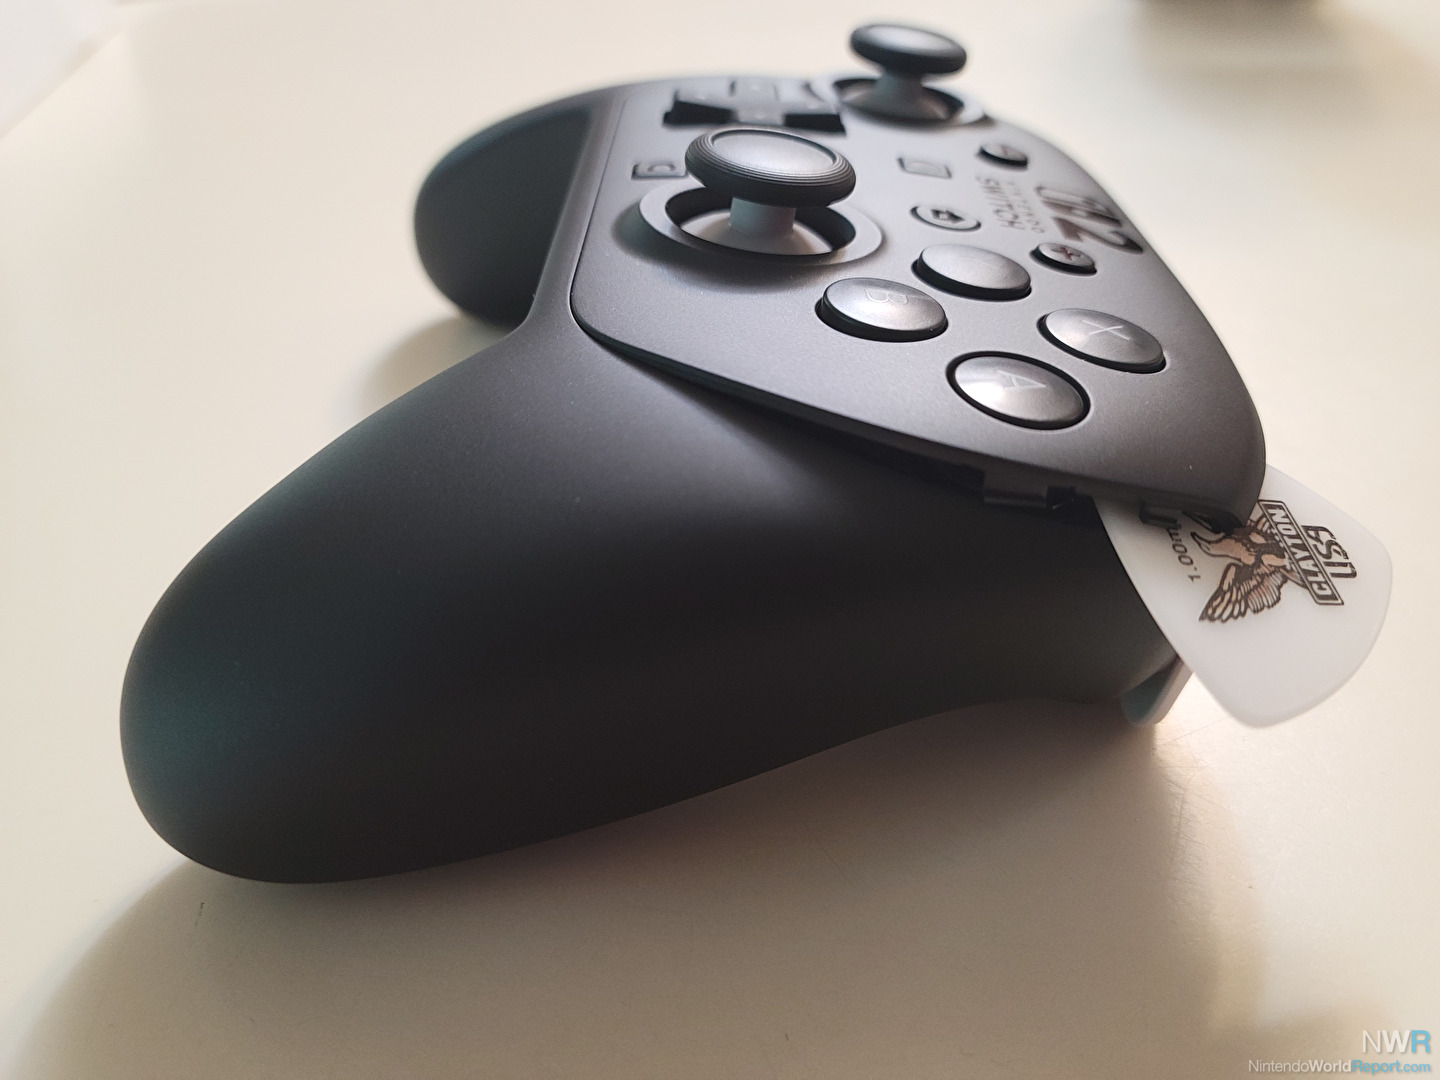
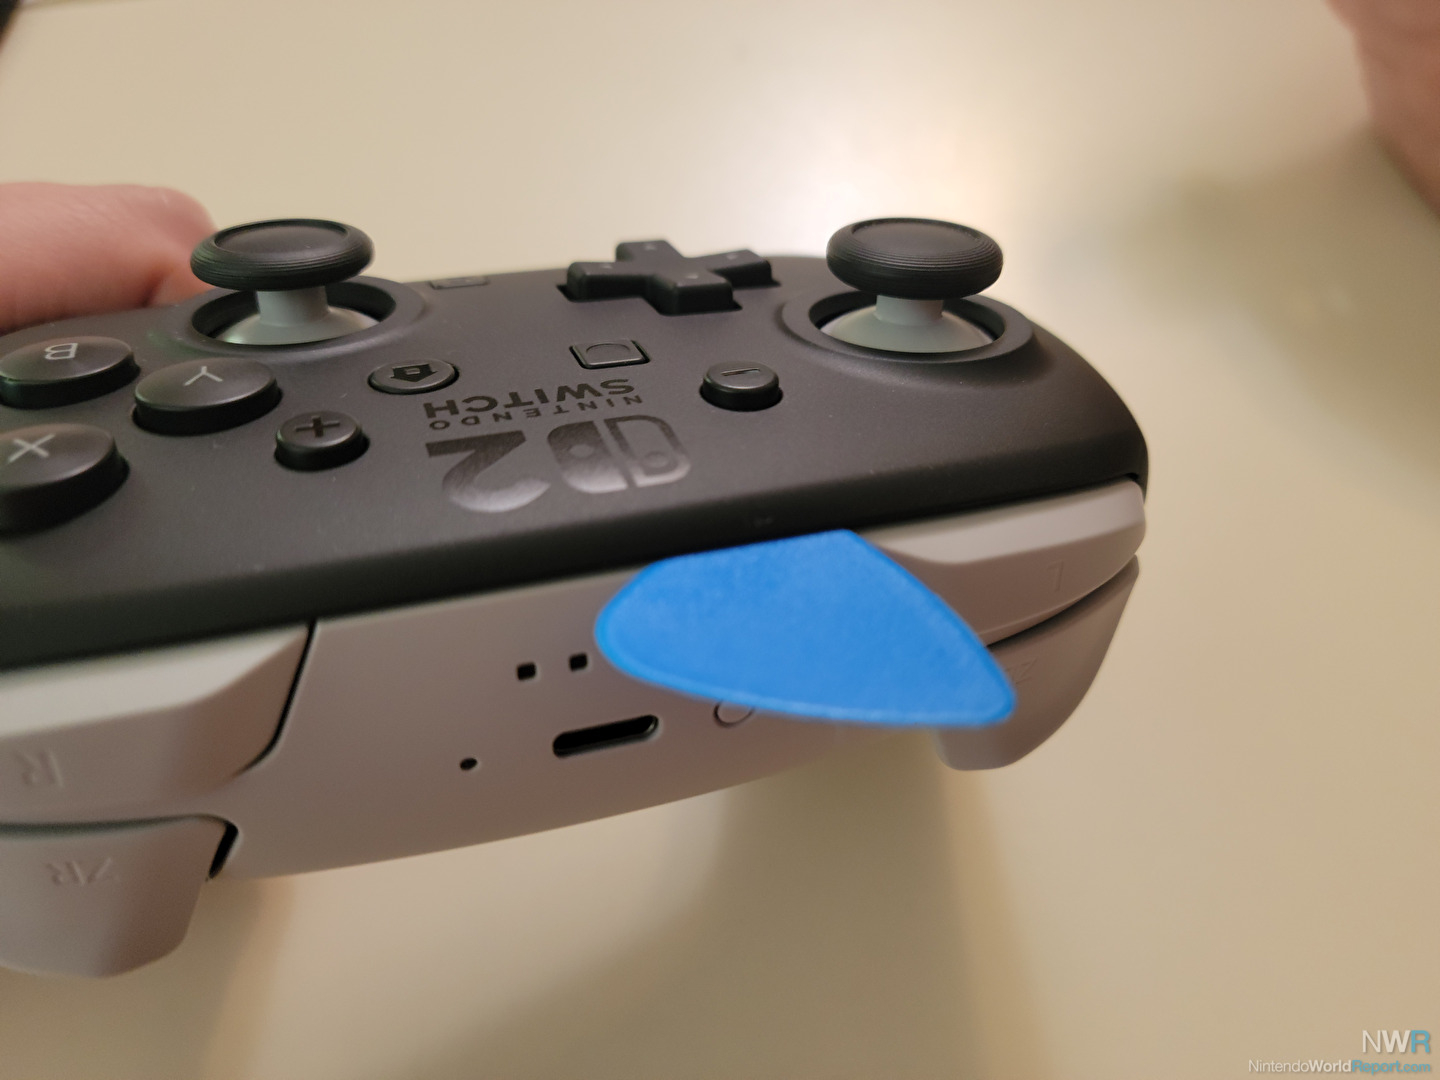
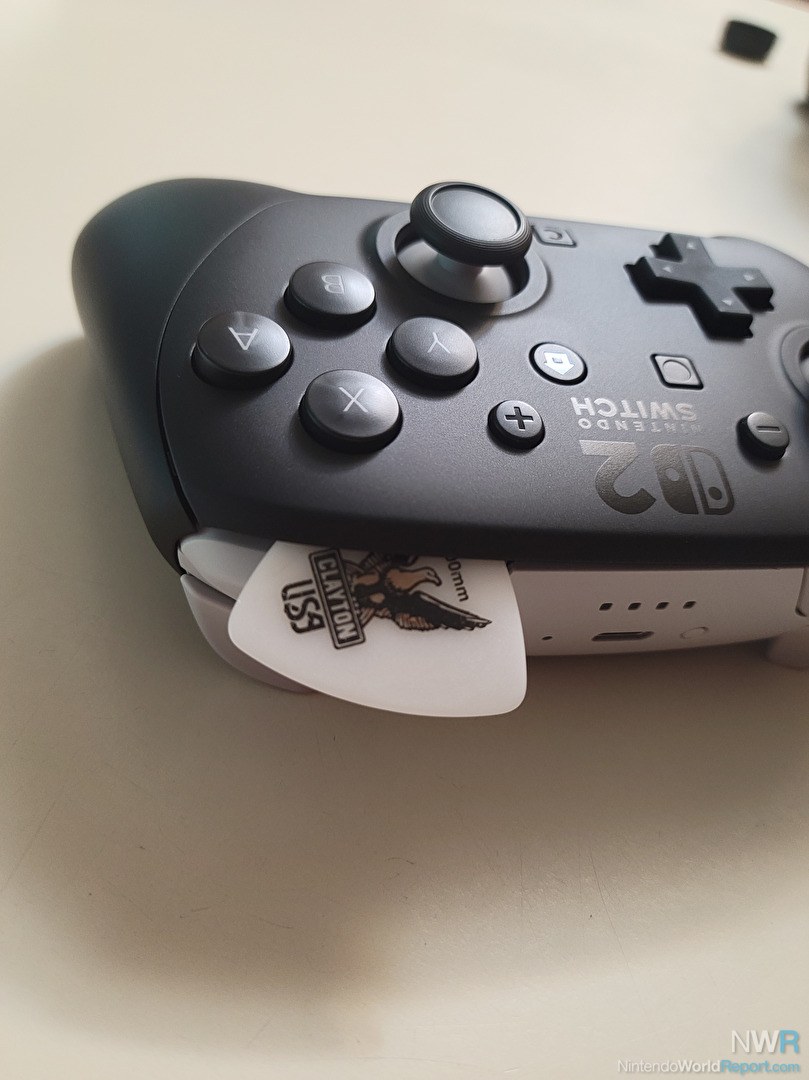
To Take away the entrance plate off the Transfer 2 Professional Controller you want to take one thing flat, like Guitar Choices, and get started through wedging them within the crease between the black and grey portions at the best of the controller. In reality push it in too as you are looking to get a divorce the adhesive keeping it down. You must really feel it tearing it aside and also you push and slide it in in moderation.
You will want to paintings your approach across the controller in moderation breaking apart the adhesive and once in a while prying the highest off just a little. This can be a little tough, so take your time and watch out to not spoil any clips.

Sooner or later you can begin to paintings your approach round and prying the face plate off must appear extra affordable.
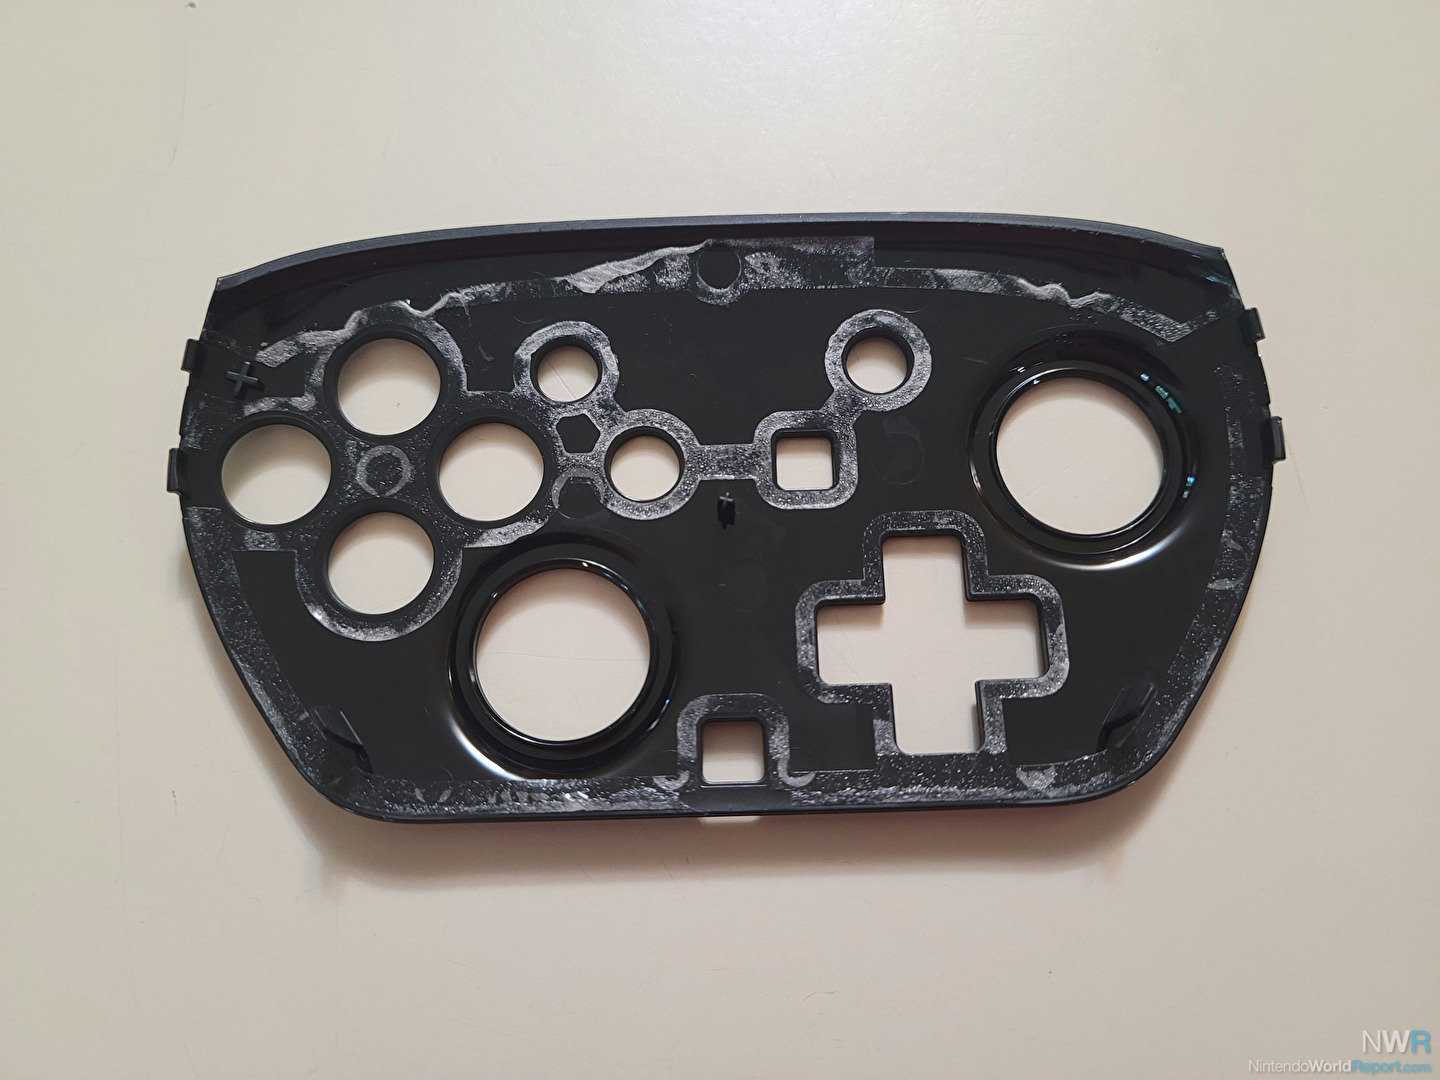
Sooner or later you must be capable of pop the face plate off and as you’ll be able to see it is most commonly simply adhesive keeping it down. Anxious for restore paintings.
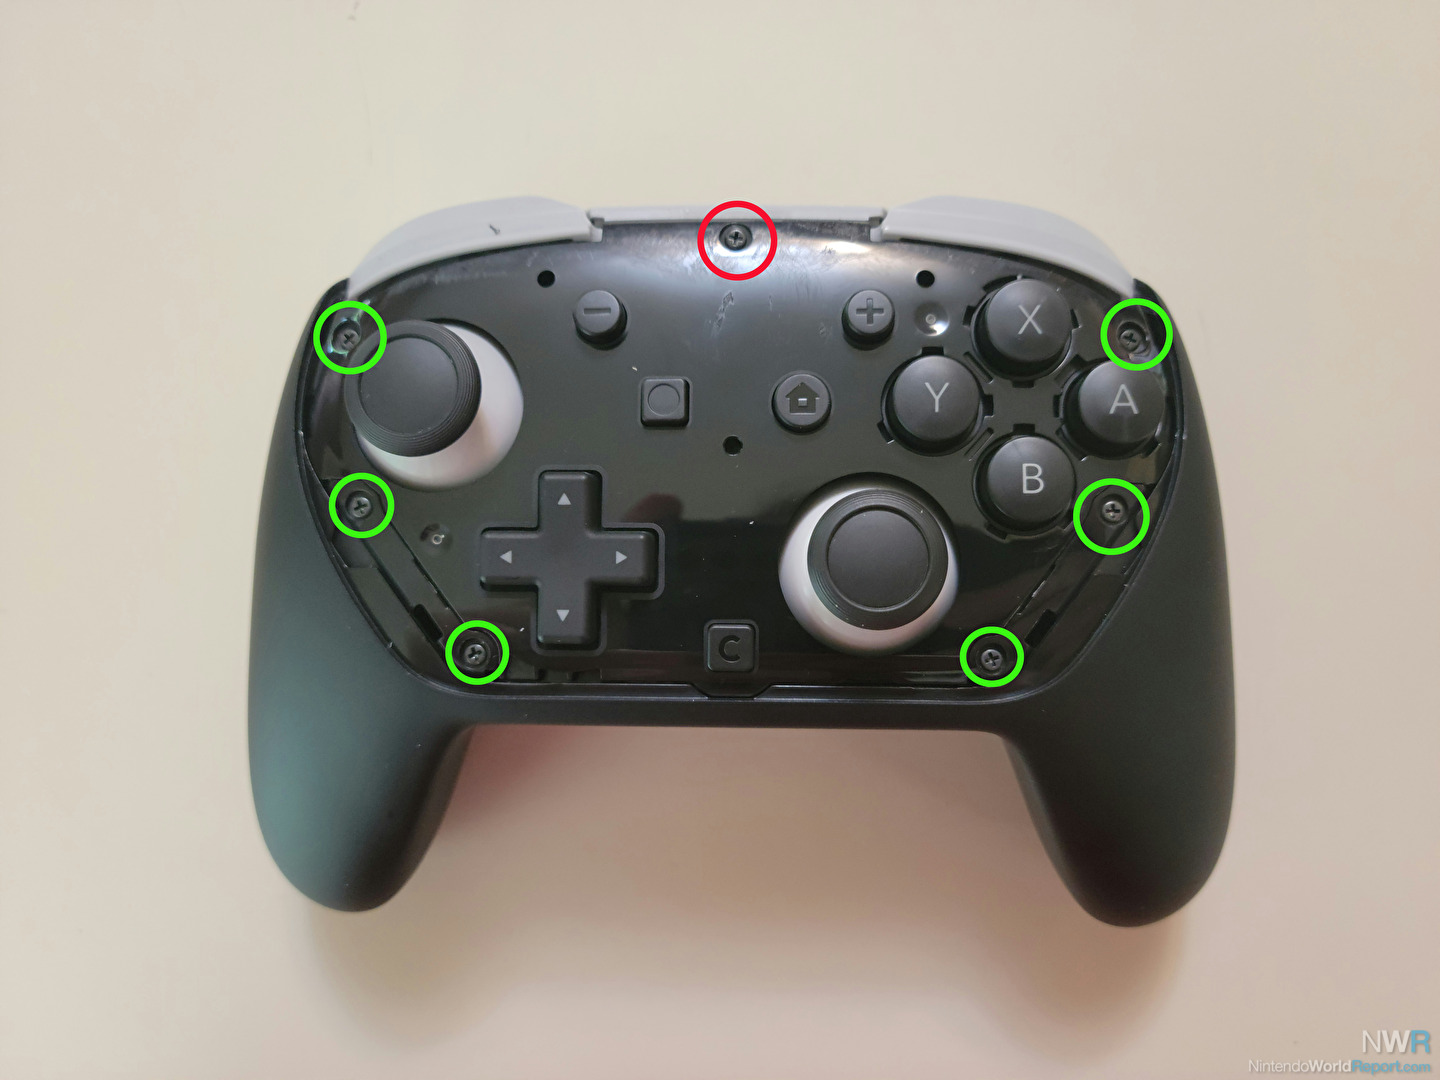
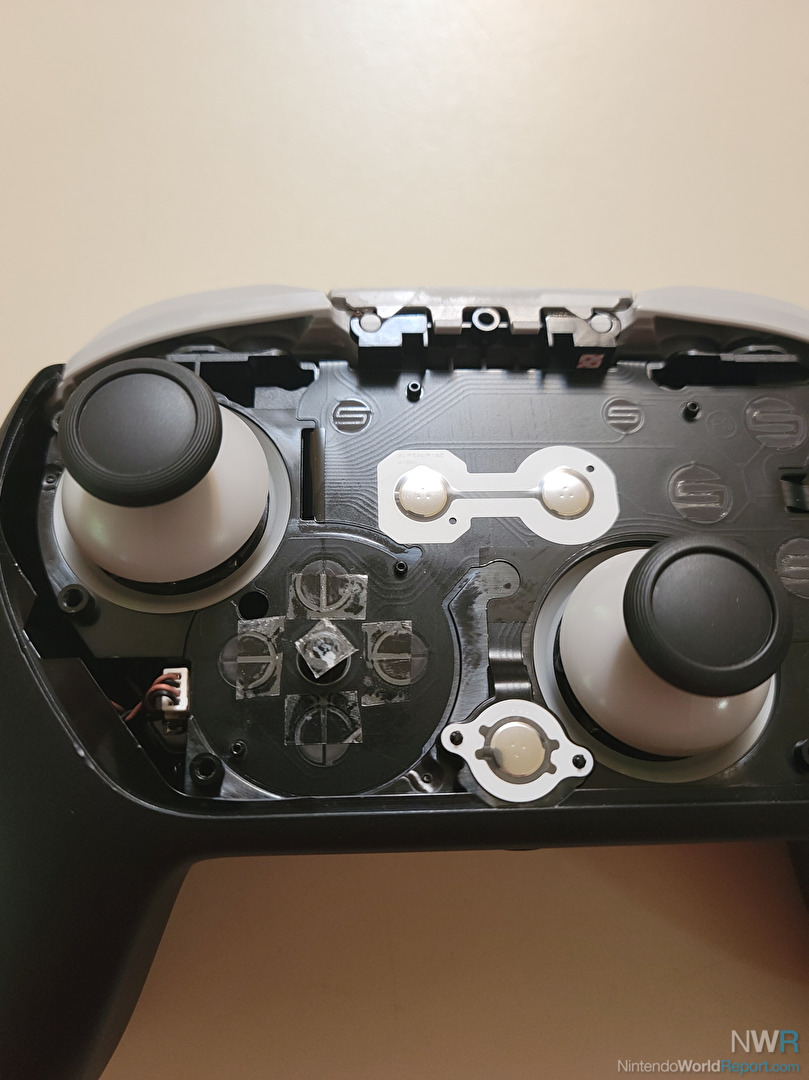
From right here you must see the following layer of the Transfer 2 Professional Controller. Take away the seven screws as proven above. Simply notice that the highest middle screw, with the crimson circle, is shorter than the remainder, so you will want to you should definitely put that again in the similar spot when placing it again in combination.
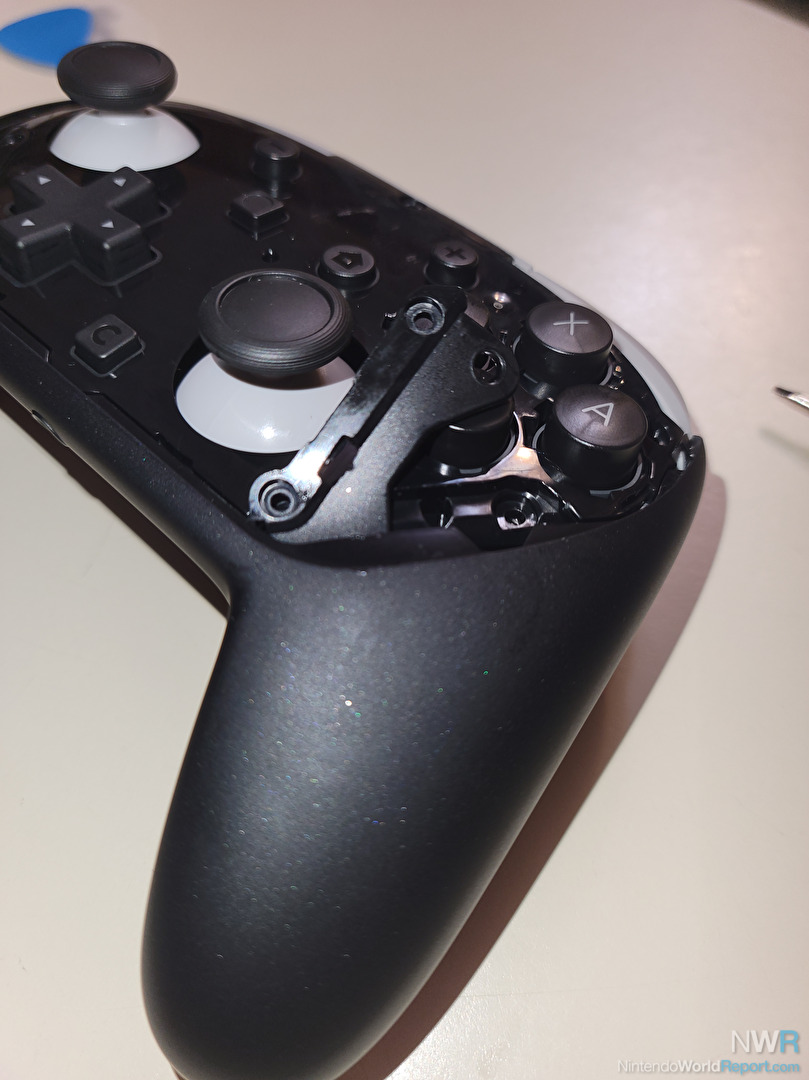
This subsequent section is slightly tough. You will want to take away the 2 items at the backside left and proper of the controller. Those are the similar items the 2 decrease screws on each and every aspect have been in. They don’t pull instantly out! They arrive out at just a little of a diagonal pointed inward towards the middle of the controller. I discovered it highest to pry the decrease finally end up throughout the little hollow slightly then to rotate the higher section out. It wasn’t too laborious to slip out after that.
In moderation do the similar to the opposite aspect.
As soon as they’re out remember to know which aspect is going the place. They may be able to’t be swapped out as they’re made for both the left of proper aspect. A excellent rule of thumb is the aspect with the notch in it is going dealing with against the ground of the controller.
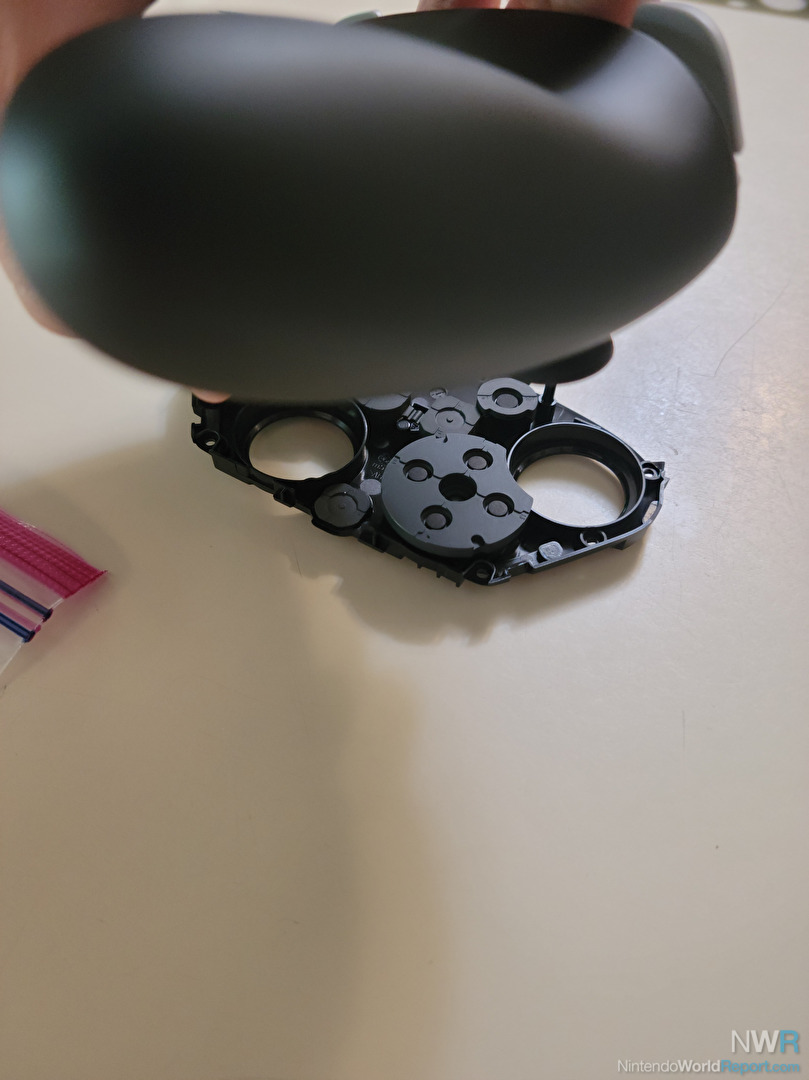
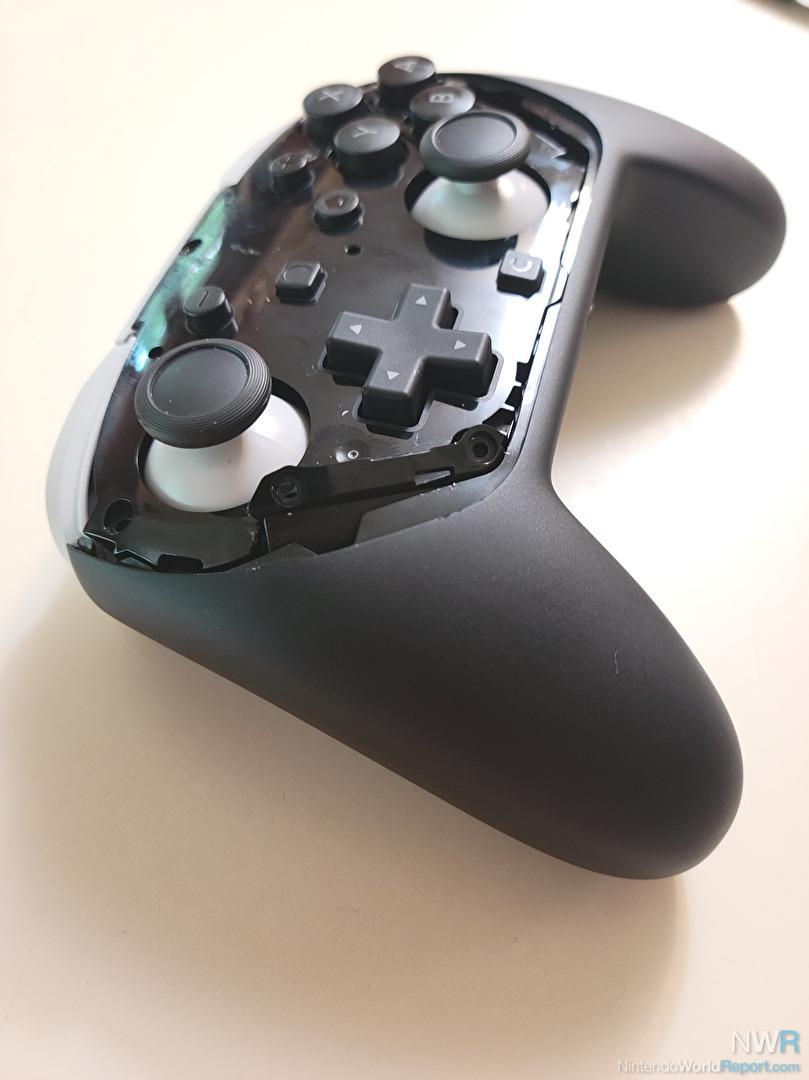
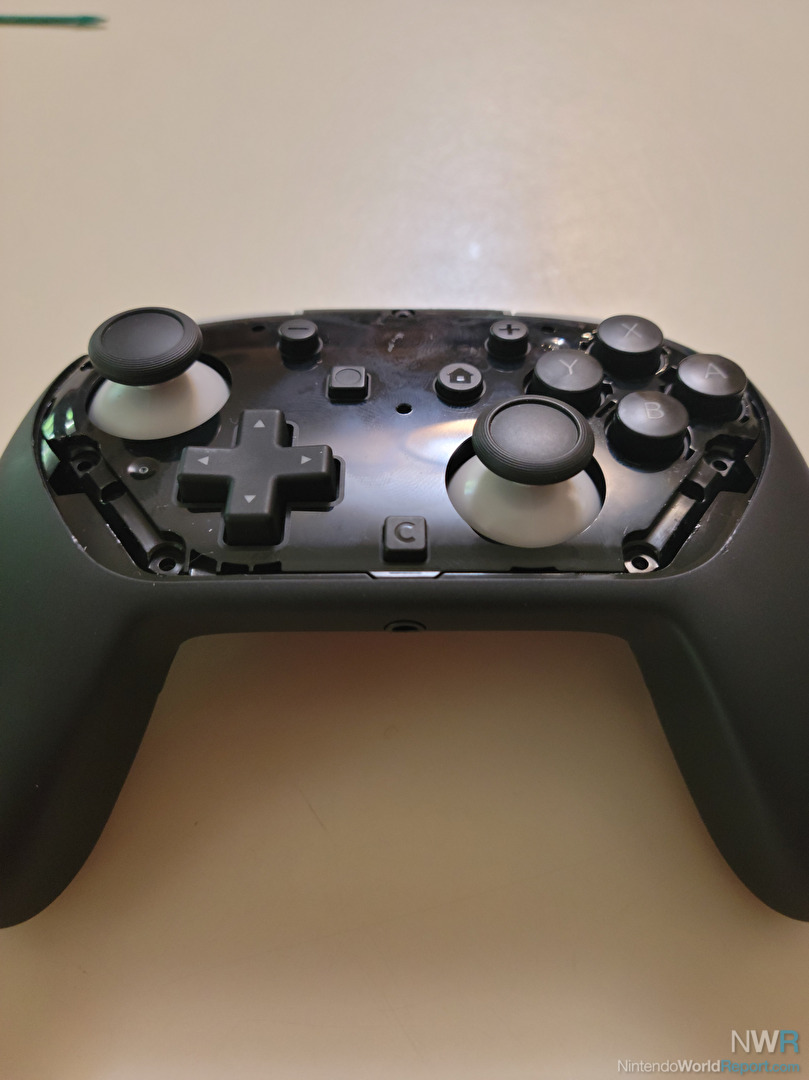
BE CAREFUL HERE! It is time to take away the Button Plate keeping all of the buttons and pads from the remainder of the controller but when you do not learn this in moderation the whole thing goes to spill out and make a large mess. I could not get excellent photos whilst doing this so once more, READ THIS CAREFULLY.
You’ll cling down the Button Plate of the controller you simply got rid of the screws from down and turn all the controller face down. Then you wish to gently pull the Button Plate off from the very best of the controller. As soon as that pops off slightly you wish to have it to hold just a little after which gently pull the ground section out and clear of the remainder of the controller. There’s a little tab on the backside under the C (Sport Chat) button that slots in to the principle controller unit.
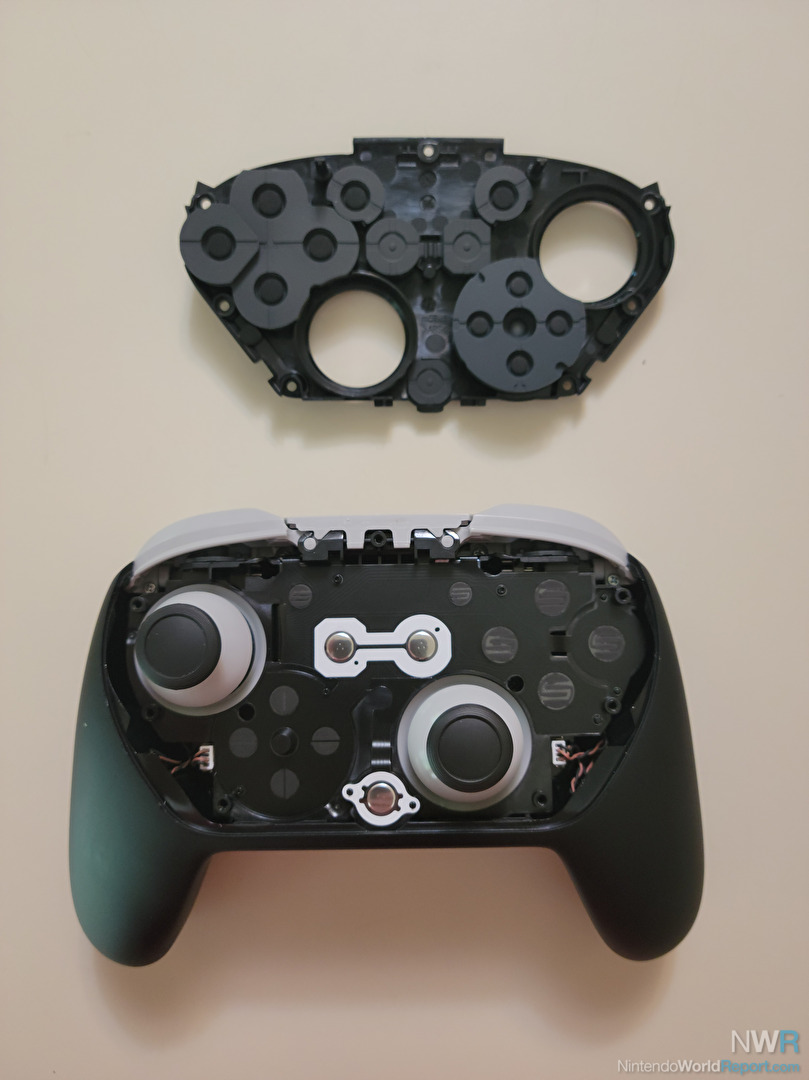
If you happen to did this proper you would not have a large number and all of the buttons and pads must be of their correct position. If you happen to reduce to rubble it is not the tip of the arena, only a ache within the ass since you will have to piece the whole thing again in combination. You will want to be informed this step neatly as you’re going to most probably be repeating it a number of occasions all over the calibration procedure. Happily, you do not wish to dig deeper into the controller from right here!
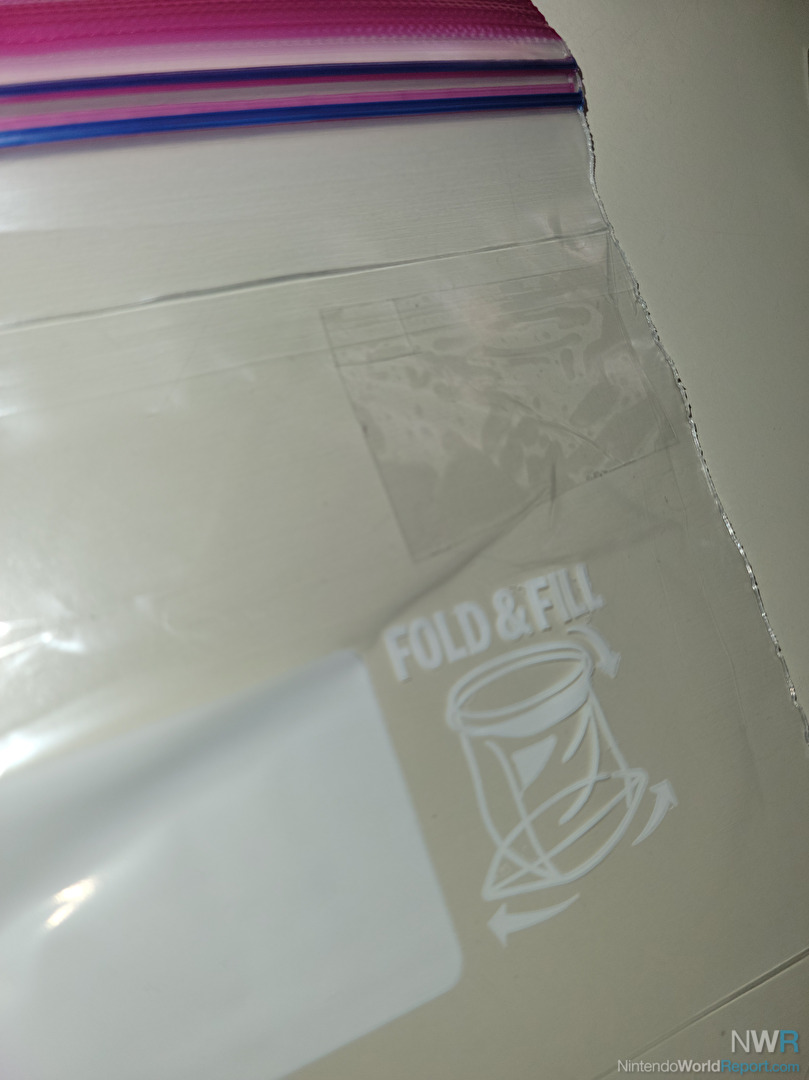
You are subsequent going to wish to take a small chew of transparent packing tape and stick it on a floor you’ll be able to reduce it with a razor blade and whilst the sticky section does not select up any particles. I caught it to a thicker Ziploc bag as I knew I may peel it off safely. Simply do not reduce throughout the bag itself and injury any floor you are running on.
As soon as you have got the tape there you wish to have to chop small rectangles of tape that you’ll be able to peel off with some tweezers. You will wish to have 4 of those to hide more or less 2/3rds of each and every D-Pad Touch quilt the internal maximum section to the outer. I additionally discovered looking to reduce a smaller round piece of tape and placing at the middle plastic submit in between the D-Pad touch helped too, however you’re welcome to check out the repair with out doing this. The image above is not my ultimate placement however it is the most efficient image I have were given as a information.
Now we need to take a look at the paintings. Turn the controller face down and in moderation put the Button Plate again on. Take into account you wish to have to slip the ground nub beneath the C Button in first prior to urgent the remainder of the Button Plate again in combination. As soon as connected firmly cling the button plate to the controller and turn it again over such as you’d most often be keeping the controller.
DO NOT reassemble the controller but. Whilst no screws are in it we wish to take a look at the paintings to verify it is serve as in a desired approach. (Within the image above I reinserted the 2 aspect tabs however DO NOT DO THIS YET!) I’ve quite a lot of exams to check out. Please consider, even with my ultimate paintings not anything was once easiest. If I nonetheless press tremendous laborious and a route and wiggle I will nonetheless get unsuitable inputs. However urgent most often turns out to recover effects. Additionally mild presses most likely may not check in anymore.
Check 1: Flip your Transfer 2 on, pass to Machine Settings, Controllers & Equipment, Check Enter Units. From right here you’ll be able to cling each and every of the 4 instructions down and wiggle it to look if it is getting any incorrect inputs. Take into account Urgent reasonably laborious might nonetheless give incorrect inputs.
Check 2: Whilst within the Check Enter Units Menu take a look at rocking between left and proper, backward and forward to look if it triggers dangerous inputs. Do the similar for up and down. Simply know when doing up and Down, as a result of your thumb rests over the aspect instructions it is a lot more straightforward to cause them when going this fashion. You’ll be able to additionally take a look at keeping the controller sideways right here to look when you have extra constant effects.
Check 3: I name this one the more than one Shoryuken take a look at. From the Check Enter Units Menu we’re going to do certainly one of Ryu and Ken’s signature strikes from Side road Fighter in each route. If you do not know this transfer it can be extra complicated on take a look at it correctly. Mainly urgent Ahead, Down, then Ahead very rapid at the D-Pad to verify it registers accurately. (Good day Side road Fighter people, I understand it formally ends with a Down Ahead however this menu does not let you know diagonals.)
Anyway you will want to take a look at the next briefly. (R,D,R)/(D,L,D)/(L,U,L)/(U,R,U)/(R,U,R)/(U,L,U)/(L,D,L)/(D,R,D). If you’ll be able to do those briefly with out different instructions being hit you are at the proper trail.
Check 4: You’ll wish to open up a couple of video games you’ve got get entry to to that let for all 8 instructions of a D-Pad to be examined. When you’ve got the Contra Assortment you’ll be able to open up NES Contra and notice if you’ll be able to level you are gun/duck simply. Although I did not have a lot drawback doing this first of all on a inventory Transfer 2 Professional Controller. I additionally counsel making an attempt it out in a shooter like Gradius Particular at the Nintendo Leisure Machine – Nintendo Transfer On-line app. You must get started out with the ability to transfer briefly within the Particular model and in all 8 instructions. Take a look at rocking backward and forward and ensure it feels proper.
Check 5:One ultimate take a look at I care to do is in Tremendous Mario Bros. Get a Tremendous Mushroom and navigate to an area that is reasonably open. Take a look at getting a run going, duck with the down button, after which doing a crouched soar whilst nonetheless transferring ahead with nice pace. Then do it going the wrong way. On a inventory Transfer 2 Professional controller I in finding this motion just about unimaginable. After doing the tape repair it is a lot more straightforward to do than prior to, regardless that nonetheless inferior to on an NES. If you wish to simply stay checking out this consider to make use of Save States.
Now in case you are proud of the effects you’ll be able to transfer directly to controller reassembly. If no longer you will need to turn the controller face down once more and take away the Button Plate. You can wish to make some micro changes to the tape placement. If one route is simply too delicate transfer the tape outward from the middle in order that extra of the touch pad is roofed with tape. If a route isn’t delicate sufficient transfer the tape again inward in order that extra of the touch plate is uncovered. Then retest.
Take a look at to not get too annoyed in this step. You might have to make changes time and again till you give you the option you are content material with. Additionally do not beat your self up, it is by no means going to be easiest, however it may be a lot better than how it got here.
As soon as you are proud of the effects you’ll be able to transfer directly to reassembling the controller.
Reattach the Button Plate, as you most probably have performed time and again through now. Then put the detachable tabs again in position, remembering they roughly pass in at an perspective nearer to the controller and that they have got particular facets they belong to. Discuss with the image from disassembly in case you combined them up.
Screw the whole thing again in combination. There must be seven screws. The shorter screw is going within the best middle the place I drew the crimson circle within the image above.
It is time to reattach the principle Face Plate. As you must consider, this was once most commonly hung on through adhesive. I have noticed on-line that many of us have had no problems reattaching this after preliminary elimination. So you’re loose to check out simply slapping it on and urgent it again in combination. That mentioned, there’s best such a lot of occasions this may paintings, if it really works for you in any respect. I had problems with the ground proper aspect of the plate, through the Proper Stick, relatively, and I imply relatively, popping again out slightly. It does not have an effect on anything else however I do have doable repair.
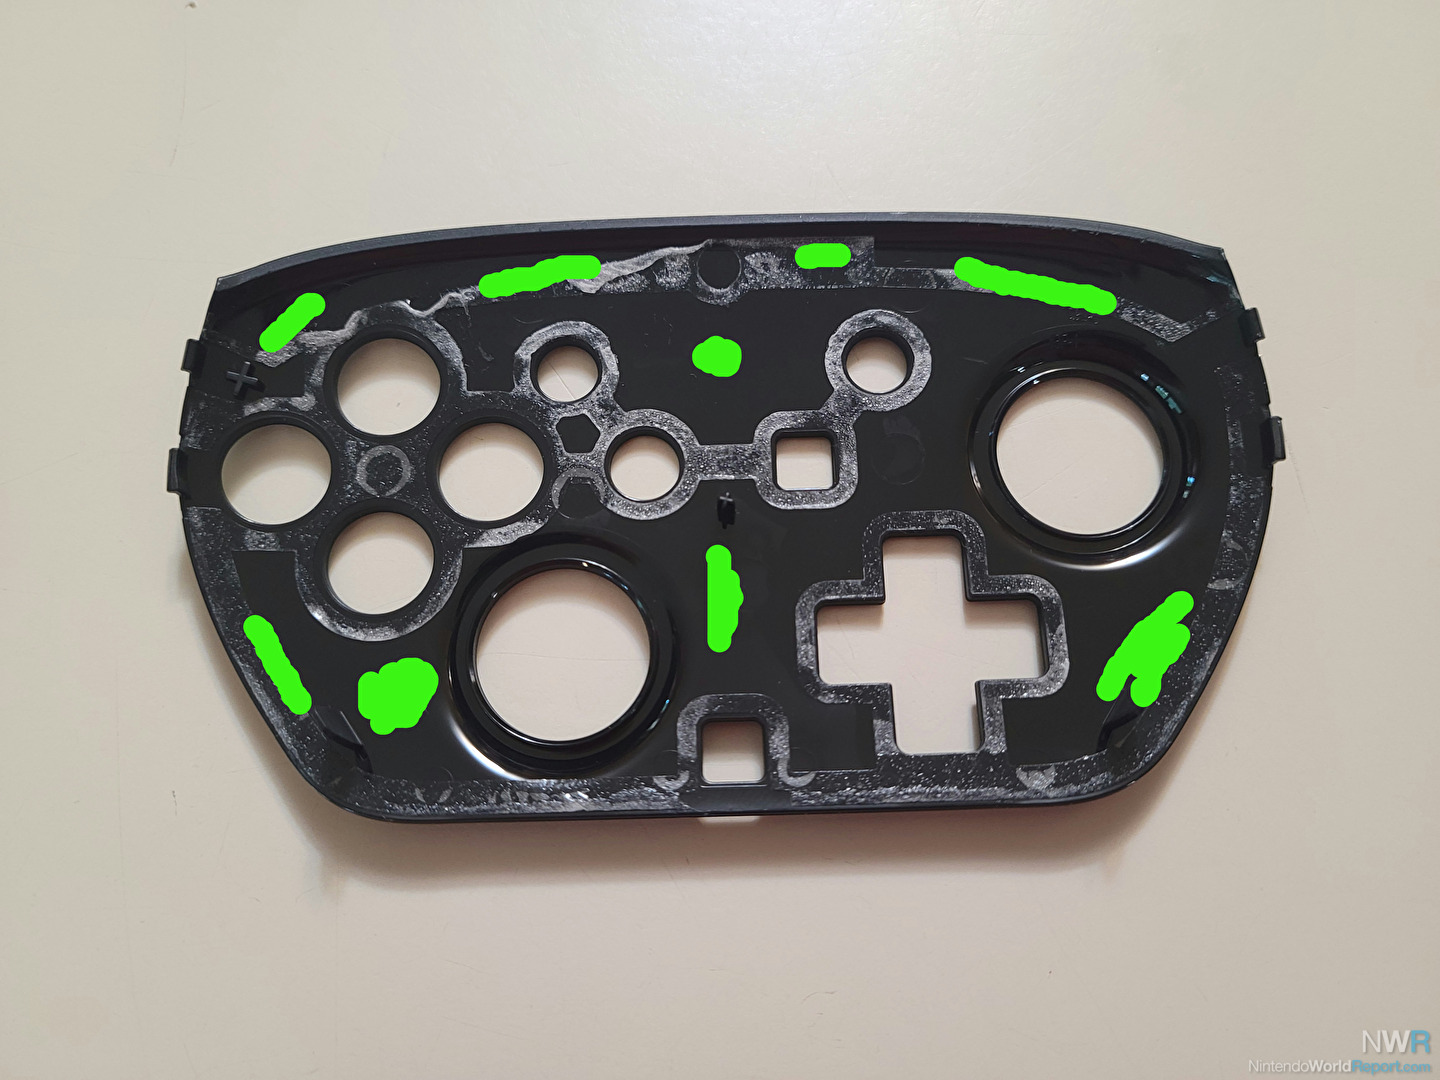
READ CAREFULLY! WARNING! You’ll be able to get some ACID FREE Silicone Glue to reapply some adhesive to the Face Plate. And please, PLEASE, PLEASE MAKE SURE IT’S ACID FREE! If the Silicone Glue has a powerful smell, you must NOT use it. Many Silicone Glues have an acid that may injury the electronics in units. Now, lots of you’re going to say we are simply gluing plastic to plastic, but when the glue has acid the outgassing of the glue may nonetheless hurt the electronics inside of. So use ACID FREE Silicone Glue which is tougher to search out.
When it comes time to connect the plate I recommend getting a toothpick and simply getting slightly bit on it and spreading it across the spaces I coloured inexperienced within the image above. You do not want to get glue through the enter units. Take into account, the fewer it’s important to use right here the simpler. You simply need it to stay, no longer get caught. Additionally, the fairway spots are only a instructed gluing space and you’ll have higher concepts. Much less is typically higher right here. You need sufficient that it is going to stick effectively and nonetheless be simple to take away at some point. The one space I used slightly extra is through the Proper Stick, as I’ve prior to now discussed that this aspect was once relatively stoning up for me.
After you have the glue on CAREFULLY put the Face Plate again at the controller doing all your easiest to not get glue in every single place. Sure, I do know one of the vital spots I put some glue might quilt the screws, so come to a decision for your self if it is a excellent thought. I examined this glue on some plastic items a couple of days prior to hand and it should not be too laborious to take away afterward. Once more, I am no glue professional, so be happy to inform me how dumb I’m within the feedback under. I deserve it for going this some distance with a silly restore on a brand spanking new controller.
As soon as the Face Plate is again on, firmly cling it in combination for a couple of mins. Then blank any extra glue off the controller with a humid, no longer rainy, paper towel or another secure object you’ve got. It’s possible you’ll then wish to give you the option to carry the Face Plate to the remainder of the controller for 24-48 hours for the glue to set. I used to be ready to wedge it between some items on a shelf that pressed the plate in combination, however I do not need a common resolution for everybody right here.
If you happen to made it this some distance you are as loopy as I’m as a result of I mentioned this text was once for tutorial use best. However hiya, congratulations on having one of the vital easiest running Nintendo Transfer 2 Professional Controller D-Pads on this planet. If you want extra unsorted photos from the method take a look at the gallery under.
Now, if there have been just a option to repair the terrible Keep watch over Stick Snap Again on those controllers we could have one of the vital easiest gaming pads ever made.
Because of all sport enthusiasts for studying.


